

How To Create A Cifs Share
Ever needed to share a folder from your Windows 10 machine so that it is accessible to other computers on the same network? Well, if you do need to do this you'll soon start learning about CIFS and NFS. For clarity;
- NFS stands for Network File Share and is used by Linux (so we're not going to be covering this within this blog post)
- CIFS stands for Common Internet File System and it is basically the Windows version of Network File Share. More specifically CIFS is actually the public version of SMB, the Server Message Block protocol. The core difference is that CIFS is actually much broader than NFS in the sense that CIFS can support the sharing of printers and serial ports.
So, now we've got the definitions out of the way the common use case for setting up CIFS is for easily sharing your files to other computers on a network, for example in an office space you may have a shared file system on a physical server in the corner of the office for example. You've got to remember, CIFS was about way before everything moved to the cloud.
How to Turn on CIFS on Windows 10
By default, CIFS is disabled on Windows 10 since the vast majority of normal users will never need to use this feature. And as such, since opening up access to your computer so that another computer can access it opens a potential security threat, it is a good thing that this feature is disabled by default. For example, imagine if anyone on your network could just place a virus on your computer, that wouldn't be good now would it.
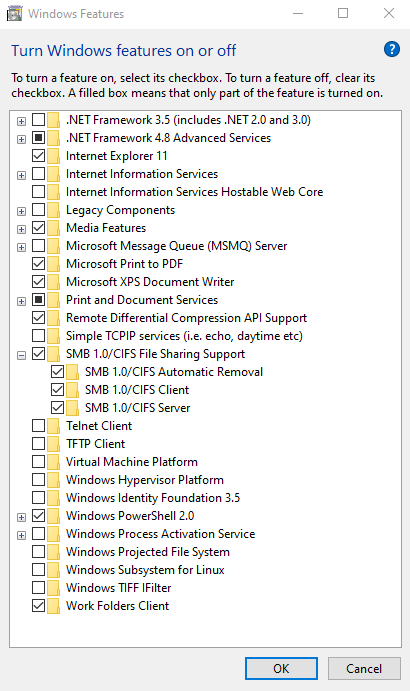
So to turn on CIFS, first open up Control Panel then Programs and Features then click on the Turn Windows features on or off. Once opened, select all of the options for SMB 1.0/CIFS File Sharing Support as can be seen below;
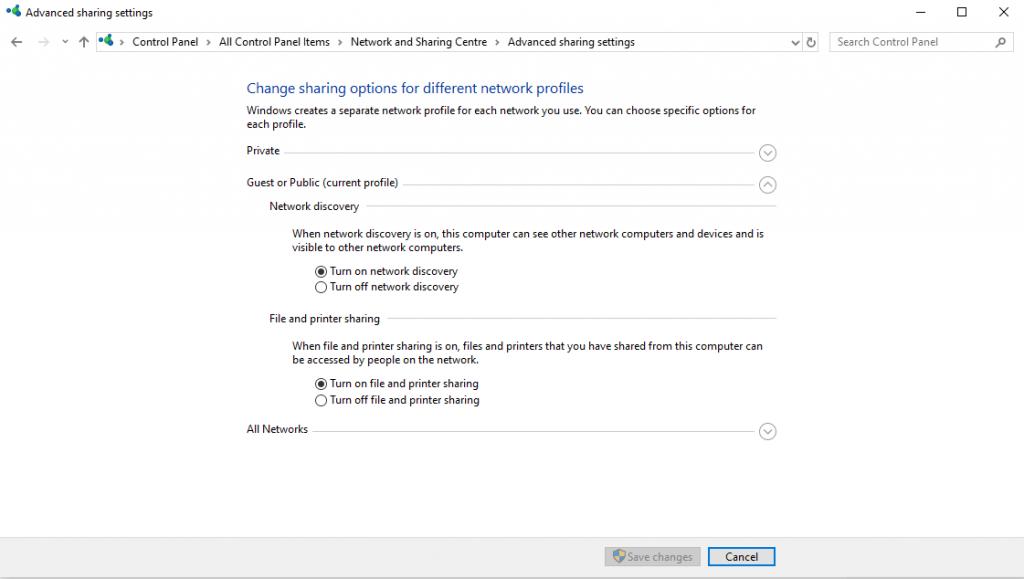
This turns things on, next we need to configure the network settings within your Windows 10 machine for the network you are currently connected to. Go to Control Panel then Network and Sharing Center then click on Change advanced sharing settings then select Turn on network discovery and Turn on file and printer sharing. Save the changes and you're done.
How to Setup CIFS on a Folder
Let's take a look at an example for how to share a folder. First, let's create a folder within your main C:\ drive, for example, C:\Your Folder That You Want To Share On The Network\.
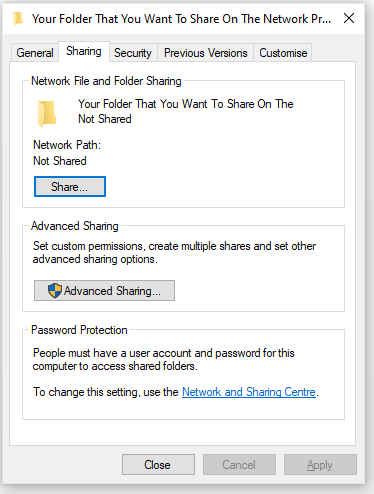
Next, simply Right Click and select Properties, then click on the Sharing tab, then on the Share button.
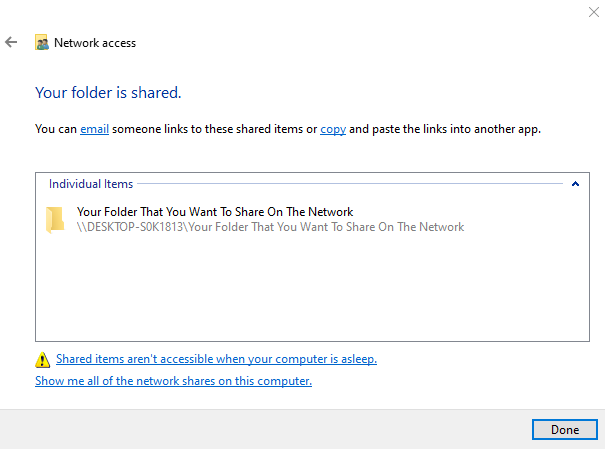
Then select the user who you want to Share this file with and click on Share. Note, that the list of users here are those who are currently setup on your Windows 10 machine. Don't think of this like modern cloud based applications work in the sense that you share something with someone by sending it to them, this isn't how this works. Instead, think of this type of sharing as making something accessible to someone else – they still have to configure things at their end to actually view this information. Once complete you'll see this confirmation;
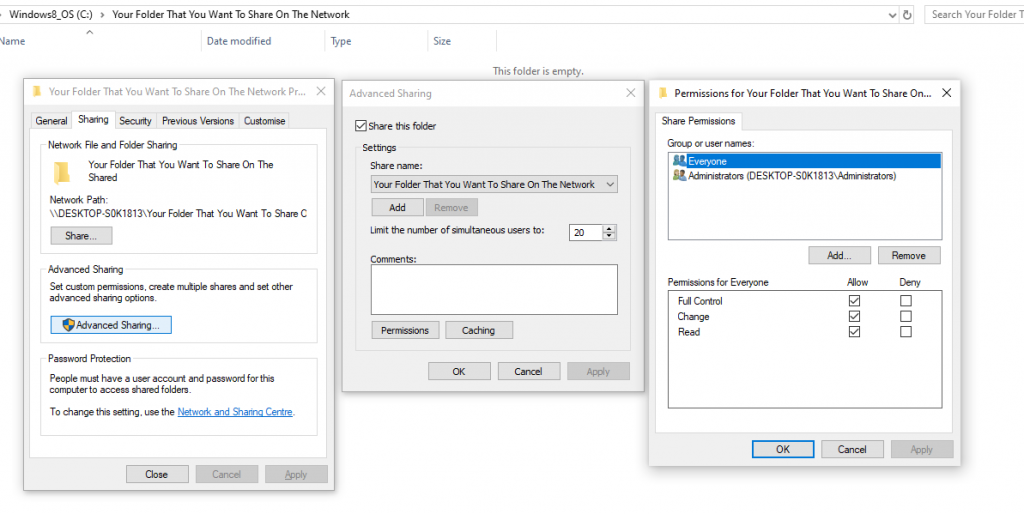
Depending on your use case, you may want to restrict what people can/can't do with the content you are sharing. If you go back to the Sharing tab in the Properties popup, then click on the Advanced Sharing options you can see in here that you can configure additional options to secure your data in the way you see fit. You can customise the permissions on the content, such as to allow or deny Read or Write access and you can even limit the number of simultaneous connections.
It's that simple to do for a very basic setup. You may want to go to lengths to secure user accounts further for example setting up additional users Windows with different levels of access.
How to Access a Shared Folder that has Been Setup Using CIFS on Windows 10 – From Another Computer on the Network
The next step is to access this shared folder from another computer on the same network. This is going to be very dependent on how you want to access this information, for example, are you wanting to access this information from within Windows itself or via an application on the other computer? As such, I'm not going to go into too much detail here other than to let you know that when you are configuring the other computer you are likely going to need to enter in one of the following options;
- \\DESKTOP-S0K1813\Your Folder That You Want To Share On The Network
- \\192.168.0.101\Your Folder That You Want To Share On The Network (i.e. the Static IP Address for the computer that is sharing the file)
And you'll also likely need to specify the username and password for the computer that is sharing the file.
Hope that helps to get you going in the right direction.
The following two tabs change content below.
- Bio
- Latest Posts

Michael founded Contrado Digital in 2013. He has experience working with national and multi-national brands in a wide range of industries, helping them achieve awesome results. Michael regularly speaks at local universities and industry events while keeping up with the latest trends in the digital industry.
How To Create A Cifs Share
Source: https://www.contradodigital.com/2019/09/08/how-to-setup-cifs-on-windows-10-to-share-a-folder-on-the-network/
Posted by: hudsonarturust.blogspot.com
0 Response to "How To Create A Cifs Share"
Post a Comment